Showing posts with label cooking. Show all posts

Wednesday, March 8, 2017

My Hello Fresh Review

I mentioned a few weeks ago we were trying out Hello Fresh and since I was very curious about how it would all go, I wanted to share my honest opinions about the food and service! As I mentioned before, my Mom forwarded me her code to make my box $20 for three meals. This is discounted $40, the regular box is $60. So, right off the bat I felt like I was getting a great deal. By the way, everyone receives their personal code that they can pass along, and in turn you get rewards for each person that signs up. The good thing about Hello Fresh, and I am guessing other meal delivery services, is that you can stop them at any time. I would never sign up for one that didn't allow that! You also get to pick your meals out of a handful of options. So now that we know the basics lets go over the food, meal by meal!

Our first meal was made on Sunday night and I thought the most involved recipe was best for this night, the Tater Topped Pot Pie. I did get excited knowing I just had to pull out that one box that had everything right there in it...no hunting, and back and forth to the fridge 40 times. In my honest opinion, a few of the potatoes were not the freshest and some of them were smaller than what I was expecting {i.e tiny potatoes!} which I think makes them harder to peel. Were they bad potatoes? No. But, I probably would have picked a few others in lieu of them at the grocery store. The mushrooms were really fresh. The finished meal was good, and I am not a huge pot pie fan! Potatoes and pot pie are right up Stephen's alley though and he loved this meal. Right away, Stephen commented that we should be doing this delivery service every week because he was impressed with the result and the price! By the way, we spend way too much money at the grocery store. It also made enough for leftovers, which was nice for Weeks the following day for lunch.

The next meal was Sassy Soy Chicken, Broccoli and Rice. I absolutely loved this meal in terms of flavor! The broccoli had a few yellow spots, so again, probably would have picked something a teeny bit fresher, but it did not affect the end result of the meal. I just trimmed that part off. They provided chicken thighs- one was pretty large and the other was significantly smaller. All this means is that one was done a little before the other, and Stephen had a lot more chicken than me! 😉  The peanut sauce that I made with it was really good too, similar to something I would have found in a restaurant and never thought to make at home! Overall, I was really impressed with how this meal turned out. It was delicious.


The last meal was the Sirloin, Parsnip Wedges and Creamed Spinach. Another really, really great meal. My parents happened to be in town and they had coincidentally chosen the same meals for the week. We opted to pool our meals together this night so we could eat together. I think this meal ended up taking the most time to prepare, but we were also catching up and entertaining kids at the same time. My Mom had some fresh green beans that she brought along that we added to the meal. Again, this meal really impressed me. I saved the recipe card and will definitely recreate it again, probably for a special occasion. By the way- I don't think I had ever eaten parsnips before?! Their take on the wedges made them seem like fries, but are much healthier. This was a fun discovery.


So, the big question is...will I do this again? Absolutely! I really enjoy cooking and planning our meals so I will not be doing this weekly, but Stephen and I decided we will do it about once a month or so, depending on the menus offered and our schedules for the week. I have to say, I wished on Sunday night I could have grabbed a box out of the fridge and started cooking. I also think you are getting really great meals at a fraction of what you would pay at the grocery store. The good definitely outweighed the bad, which was minimal. I think I learned a bit too! Our recipes also called for roasting vegetables several times, and they turned out fabulous. Roasting veggies is not in my usual routine and I will be incorporating that into future cooking!

If you guys are still reading, thank you! I know you probably didn't need to hear every detail about my dinners but I wanted to give an honest opinion! If you want to try it out, my link is here {code is KRHILLM}. Any questions? I am happy to answer! Have you tried a meal delivery service yet?

Thursday, May 14, 2015

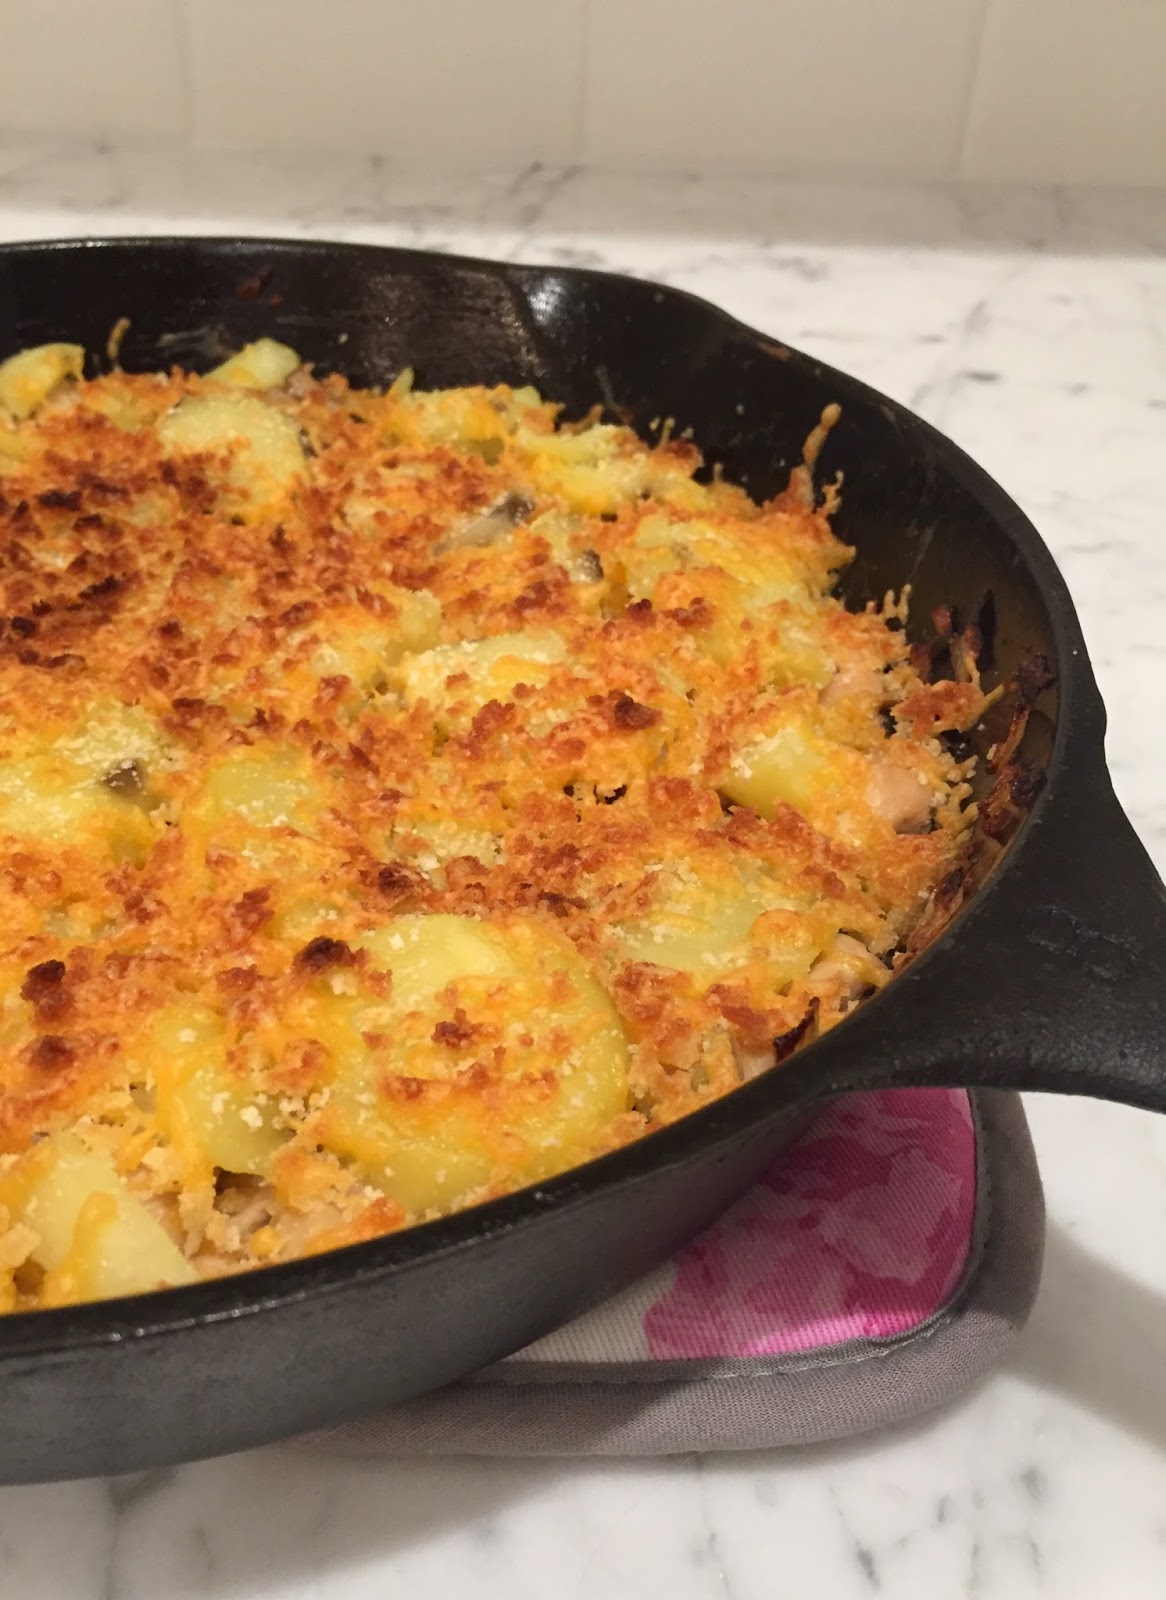
Easy Recipe: Chicken and Mushroom Skillet

I had planned for another post today, but decided to switch it up since I haven't done a recipe in a while. We have been so busy lately we have hardly had time to cook. After how busy we have been, it almost overwhelmed me when it came to getting back into the swing of meal planning. Then, I thought about enjoying summer evenings versus being inside cooking for a long period of time...it made me make a choice. Let's make it our goal to keep meals simple at dinner so we can enjoy the summer. I'm sure I will get an urge every now and then to try new and delicious recipes, but for the most part I want to keep our summer menu easy and fresh! 

This is not neccessarily a summer meal, but definitely one you can enjoy year round. I absolutley love that there are only a handful of ingredients and one skillet! So rare to come by. I would say it is pretty healthy, and filled us up with out any other sides. And, major bonus- it is perfect for 2 people!


EASY CHICKEN AND MUSHROOM SKILLET

INGREDIENTS:
2 boneless chicken breasts {original recipe uses skin on, I just used regular chicken breasts}
Kosher Salt or Sea Salt, to taste {I used Kosher because I had that}
Black Pepper, to taste
2 tbsp olive oil
8 oz fresh mushrooms, sliced 1/4 inch thick
1⁄2 cup water
1 tbsp butter
1 green onion, chopped, for garnish

Directions:

Preheat oven to 400 degrees F.
Season both sides of the chicken with salt and black pepper. Heat olive oil over medium / medium-high heat in an ovenproof skillet. Place chicken in the skillet and cook until browned, about 5 minutes. Turn chicken over and add mushrooms. Increase heat to high and cook, stirring mushrooms occasionally, until the mushrooms shrink slightly, about 5 minutes. Season mushrooms with a pinch of salt.
Place skillet in the oven and cook until the chicken is no longer pink, 15 to 20 minutes. Transfer chicken breasts to a plate and loosely tent with foil. Set aside.
Put skillet on the stovetop over medium-high heat. Cook and stir mushrooms until brown bits start to form on the bottom of the pan, about 5 minutes. Pour water into the skillet and bring to a boil while scraping the brown bits off the bottom of the pan. Cook until the water is reduced by half, about 2 minutes. Remove from heat. Stir in any accumulated juices from the chicken into the skillet. Add butter and stir constantly until the butter is completely melted and incorporated. Season with salt and black pepper, then spoon the mushroom sauce over the chicken and garnish with green onion.

When we keep dinners on the simple side we can enjoy walks like this after dinner, and for that I am thankful.


Wishing you all a good rest of the week! 

Wednesday, April 9, 2014

Sunday Dinners

Thank you all so much for your sweet comments on our Charleston trip. We really, really enjoyed it and it's the perfect weekend trip for a couple. I completely forgot to mention our hotel! We stayed at the Renaissance and were so pleased with the stay. It was just shy of being on King Street which gave us the advantage of not being in the hustle and bustle, but being so close to the main attractions. It was also on a quieter side street which was nice to return to each evening. The hotel staff was great and it was wonderful hotel quality for a smaller, boutique size hotel. 

Anyway, back to our Sunday dinners. We love making something good on Sunday, especially something hearty or that can cook late in the afternoon. That is the best! I know once it warms up for good we will be spending our time grilling instead, so it's nice to enjoy these kinds of meals right now. The good news is- even though these are typically hearty dinners - they are light versions. It just so happens we made italian two weeks in a row. That usually doesn't happen, but I'm happy to have new things for a dinner rotation. PS- Sorry ahead of time for really bad iphone pics.

First up, Turkey Meatballs. The sauce recipe literally blew my mind. Are you ready for this? Ok, it is one bottle of ketchup and one beer. That. is. it. I mean, I am still not over that. I was a little scared but so intrigued, so we made it and it was really...pretty good. How crazy!? Good to know. You cook your turkey meatballs in the sauce though, so it does have a nice flavor. I froze half of the uncooked meatballs to make another time which is always so nice. We used egg noodles {find them in the freezer section} and were so good. 


Next up, cauliflower pizza! My sister recommended this version by Paula Deen and it is a keeper. We fancied it up and did Fig/Prosciutto on one side and margerita on the other. No guilt from pizza on this night! 


Do y'all do it up big for Sunday dinners?

Thursday, June 13, 2013

Katie's Kitchen

Katie's Kitchen

It's no secret I don't mind spending time in the kitchen. I believe a kitchen should be fun and functional. If you open our drawers and cabinets you will find plenty of colorful gadgets and bowls. Nothing is too streamlined here! These are a few of my favorite tools that make cooking and baking fun for me.

The Garlic Press was a stocking stuffer a few years ago and gets the job done, it's so nice to have on hand. 
If you've never had popcorn freshly popped from a Whirley Pop, you are really missing out. 
We have been using these Silicone Prep Bowls all the time lately, they are perfect for chopped veggies to divide and toss into salads. 
My Toss and Chop Salad Chopperhave gotten tons of use lately and make your salads pretty! 
A wedding gift favorite, our Le Creuset French Oven is such a nice piece of cookware. Nice cookware absolutely makes a difference in my mind. 
For perfectly shaped cookies, you must use a Cookie Scoop like this one. 
And most importantly, you must have a good Wine Opener and Wine Bottle Stoppers.  I love the colorful Rabbit brand! 

What are your kitchen favorites?


Thursday, May 31, 2012

Summer Cookout

We had been at the beach house all weekend and nothing sounded better than having our own little cookout and spending the evening at home. I ran by a local market to pick up the freshest vegetables and headed to the grocery store for all the essentials. What was on the menu, might you ask? Nothing better than charcoal grilled hamburgers, cucumber and tomato salad AND fried green tomatoes. Yep.

So the fried green tomatoes were sort of an afterthought after I saw them at the veggie stand. We usually have them a few times each summer and so far we had not devoured any. I used this recipe to fry up that delicious goodness. Have you ever had a fried green tomato?
 Don't cringe until you try one.


In times past, I have served mine with pimiento cheese. It just doesn't get any more southern. But, I had an itch to try something new and I have to say it was absolutely divine. In fact, I served both in case nobody liked my new version, but in fact everyone preferred it! All you have to do is add goat cheese crumbles and a spoonful of pepper jelly to the top of your tomato. Truly amazing.


I also made another southern staple, the Cucumber + Tomato Salad. Lucky for us, Stephen had his first cucumber fresh from the garden ready to eat that night.


I used Paula Deen's Cucumber, Tomato and Onion Salad Recipe and it did not disappoint. I added a little more apple cider vinegar because too much is never enough for this salad.


When we sat down for dinner I was thoroughly excited. Stephen's parents joined us at the last minute and also brought over some macaroni and cheese.


This menu might be making an appearance again sometime soon- it was that good! Especially for a weekend night when it is time to indulge. What is on your summer cookout menu? Do share! 

Thank you for your sweet comments and messages yesterday- y'all are the best! 
Hope you have a great Thursday- xo.

Tuesday, April 17, 2012

Black Bean Quesadillas

I think everyone is well aware that I love Mexican food, and a few weeks ago I was in the mood for a new variation on what seems to be our weekly fix. These are healthy, tasty and were so good that I made them again last night! This recipe originally came from Cooks Illustrated, so you know it is good stuff. We only had to pick up a few things for these, making them easy on the wallet. Don't get discouraged by the many steps- they are quick and easy.


Servings: 2 folded 8-inch quesadillas

INGREDIENTS

1/3 cup frozen corn kernels, thawed
2 teaspoons vegetable oil, plus more for brushing the tortillas
1/3 cup minced red onion
1 teaspoon minced garlic
1/2 teaspoon chili powder
1/3 cup black beans (canned)
2 teaspoons lime juice
Kosher salt
2 plain tortillas, 8-inch
2/3 cup Pepper Jack cheese, in pieces or shredded

INSTRUCTIONS

 -Heat a 10-inch nonstick skillet over medium-high heat until hot, about 2 minutes.
-Add the corn and cook, stirring occasionally, until kernels begin to brown and pop, 3 to 5 minutes; transfer corn to medium bowl.
-Heat 2 teaspoons vegetable oil in now-empty skillet over medium heat until shimmering; add red onion and cook, stirring occasionally, until softened, about 3 minutes.
-Add garlic and chili powder and cook until fragrant, about 1 minutes; stir in beans and cook until heated through, about 1 minute.
-Return corn to skillet and toss to combine; gently press mixture with spatula to lightly crush black beans.
-Transfer mixture to now-empty bowl, stir in lime juice, and season to taste with salt.
-Wipe out the skillet with paper towels and return pan to medium heat until hot, about 2 minutes.
-Place 1 tortilla in skillet and toast until soft and puffed slightly at edges, about 2 minutes.
- Flip tortilla and toast until puffed and slightly browned, 1 to 2 minutes longer.
-Slip tortilla onto cutting board.
-Repeat to toast second tortilla while assembling first quesadilla.
-Sprinkle 1/3 cup cheese, half the corn and bean mixture over half of tortilla, leaving 1/2-inch border around edge. Fold tortilla in half and press to flatten. Brush surface generously with oil, sprinkle lightly with salt, and set aside.
-Repeat to form second quesadilla.
-Place both quesadillas in skillet, oiled sides down; cook over medium heat until crisp and well browned, 1 to 2 minutes. Brush surfaces with oil and sprinkle lightly with salt.
-Flip quesadillas and cook until second sides are crisp and browned, 1 to 2 minutes longer.
-Transfer quesadillas to cutting board; cool about 3 minutes, halve each quesadilla, and serve.
-------
And a tip from me, I buy the Birds Eye Steamfresh frozen corn that comes as four small separate frozen packs, perfect for a quick side dish or a recipe that calls for a small amount like this. If there's more than two of you, definitely double the recipe- it makes exactly two quesadillas.
Tried any new recipes lately? This one is a definite keeper- I love it when that happens!
Happy Tuesday, xo.

Tuesday, March 13, 2012

Cocktails + Dinner


Nine times out of ten I prefer a glass of wine over a cocktail, but I felt like trying something new Saturday night. I almost never make a cocktail at home {hence, the leftover mini bottles from my bachelorette party that has been in the freezer for two years?! Does it ever go bad??}. 
Anyway, I ended up with a Pomegranate Lemon Martini!

Here's what I used:


POMEGRANATE LEMON MARTINI
-2 parts sparking ICE lemonade {found in the flavored water section}
-1 part pomegranate vodka
-Add one lemon wedge and enjoy!

This is also a great low calorie drink since the lemonade has zero calories! I think this would be a great drink after a hot day, make sure it's nice and cold:)

That night we also had one of the best meals we have made in a long time. Being on the coast, we really should take more advantage of having the freshest seafood readily available, but we do take it for granted most of the time! Stephen grilled some marinated shrimp for us as an appetizer and yes, we ate all of them {the dogs had some as well} We use Italian dressing as a marinade- one of the best and easiest ways!


Here is one of our favorite recipes for grouper, but you could really use this on any white fish! This came from our Coastal Living Cookbook.

HEAVENLY BROILED GROUPER
-2 pounds grouper fillets
-1/2 cup grated Parmesan cheese
-3 tablespoons chopped green onions
-3 tablespoons mayonnaise
-1 tablespoon butter or margarine, softened
-1 garlic clove, pressed
-1/4 teaspoon salt
-Dash of hot sauce

Place fillets in a single layer in a lightly greased 13x9 inch pan. Stir together cheese and remaining ingredients; spread over fillets. Broil 5 1/2 inches from heat 10 minutes or until lightly browned and fish flakes with a fork. Yield: 6 to 8 servings.


We served ours over jasmine rice and with a Caesar salad.

I know a lot of people are skeptical over seafood and I was once that way too. You really have to try it freshly caught if you are a skeptic!  I kid you not, this recipe is perfection and you must try it! 

So if you are a seafood lover like me, do you have any recipes to share? Or any easy cocktail recipes that you have put together on a whim? Hope you all have a wonderful Tuesday! xo.

Wednesday, February 29, 2012

Meat and Potatoes

Not to bombard you with more recipes this week, but I have some more food news to share! Last weekend I decided I needed to expand my cooking horizons and get down to basics. My husband is a "meat and potatoes" kinda guy...he could eat that up for dinner any night of the week. I tend to lean more towards pasta dishes, sauteed chicken, or of course my go-to Mexican food {you know, things that can be prepared after work and after I stop at the store on the way home}. 

So Sunday afternoon, my mom walked me through roasting my very first chicken {and potatoes, carrots, onions and gravy from scratch to boot!} I guess you can say I never knew what I was missing. First of all, that lovely aroma of chicken roasting in your very own oven...I didn't know mine was capable of that. Second of all, we had leftovers turned into a buffalo chicken salad Monday night, and still have more leftovers in the freezer. I'm the furthest thing from a leftovers fan, so believe me when I tell you this is good stuff! I present to you my first chicken...


Since my mom is quite the cook and very patient with me on the other end of the phone {How far does the thermometer pop out when it's done??}...this turned out great! I'm glad I went with her recipe and not one online, some things you just can't compete with :)

Last night, I tried out this recipe by Pioneer Woman since I had half of a bag of red potatoes left over. I became a huge potato fan after trying these and they will most definitely be put on the regular rotation of side dishes for our dinner menus. 


They were really simple to make. I will give you the run down, but for full instructions make sure you check out the Pioneer Woman, she has tons of lovely photos to accompany!


-Boil potatoes in salted water until fork tender
-Drizzle oil on cookie sheet, place potatoes on the cookie sheet
-Smash them with a potato masher {I don't have one somehow, I used a glass}
-Baste with olive oil and sprinkle S+P {she used herbs, I did not}
-Bake in oven 20-25 minutes at 450

I really couldn't get over how tasty these potatoes were, for such a simple recipe. Stephen even commented that they looked like something out of a magazine! Best compliment ever. They just might be the best potatoes I've ever had!

Other things I hope to make soon are:
-Popovers
-Beef Tenderloin
-Lasagna {yes, it's true I've never made it! eek}
-A Pie {any fruity pie, I've only made a butterfinger one before}
-Gnocci

Any basics you think I can add to this list? I have accomplished a few things on my cooking horizons list this week and feel pretty good about it! Ya never know when you will need to roast a chicken, right?

Have a great day! xo.

Wednesday, January 25, 2012

Dinner Favorites of the Week

I have a few recipes that I want to share that I think anyone will really enjoy! These two recipes share the same fresh vegetables, so when I decided to make quinoa burgers I immediately thought of this yummy app I saw on pinterest last week. First of all, I absolutely love appetizers-they are my favorite part of a meal. This one is delicious and healthy, and has the husband stamp of approval. I made ours bite size with a small heart cookie cutter.  
HUMMUS AND AVOCADO TOASTS WITH ROASTED TOMATOES
 6-8 slices of bread [gluten-free, whole wheat, etc.] 
1/2 cup hummus [store bought or homemade]
 1 avocado – halved, pitted and peeled
 4 plum tomatoes, halved lengthwise, cores and seeds removed
 2 tablespoons extra virgin olive oil
2 teaspoons balsamic vinegar
salt + pepper to taste

Directions:
1. Preheat the oven to 450 degrees F.
2. Arrange the tomatoes on your baking sheet, cut sides up, in a single layer. Drizzle with olive oil and balsamic vinegar. Season with salt and pepper.
3. Roast for 25-30 minutes, until the tomatoes are beginning to caramelize
4.While the tomatoes roast, toast your bread. Using a cookie cutter or circular object, cut out 1-2 circles per toast, depending on how big the piece of bread is.
5. Spread ½-1 tablespoon of hummus on each circular toast.6. In a bowl or plate, mash avocado with a fork, leaving large chunks.
7. Layer the mashed avocado over hummus, season with salt + pepper.
8. Top with a roasted [or fresh] tomato. Serve immediately.

And for the next recipe....

This was the second time I made these quinoa burgers, and they were actually requested by the husband himself. He did see the quinoa in its uncooked form and asked "What is that??" He had not seen it before and it is rather surprising to see it for the first time!
QUINOA BURGERS

INGREDIENTS:
2 rounded cups cooked quinoa (see note below for cooking instructions)
3/4 cup shredded cheddar cheese (or other variety, if you prefer)
1/2 cup low-fat cottage cheese
1 medium carrot, finely grated (OR 1 cup shredded zucchini, squeezed)
3 eggs
3 tablespoons all purpose flour
2 green onions, including white parts
1 /2 teaspoon Splenda or sugar
1/4 teaspoon black pepper
1/4 teaspoon ground cumin
1/8 teaspoon salt
1/8 teaspoon garlic powder
Olive oil for frying

DIRECTIONS:

To cook quinoa:
1 cup uncooked quinoa
2 cups water
1/2 teaspoon salt

-In a medium saucepan bring the 2 cups water and 1/2 teaspoon salt to a boil over high heat. Add quinoa and reduce heat to low. Cover and cook for 18-20 minutes, or until all water is absorbed and the seeds are tender. Allow to cool for a few minutes.
-In a large bowl combine the cooked quinoa, cheddar cheese, cottage cheese, carrot, eggs, flour, green onions, Splenda, pepper, cumin, salt, and garlic powder.
-Heat a frying pan and a couple teaspoons olive oil over medium-low heat. Mixture will be slightly sticky, so using a 1/4 cup measuring cup, drop mixture into pan and lightly flatten to 1/2 inch thick. Fry until golden-brown, about 4 minutes on each side. Makes approx. 10 burgers.


A few tips: the recipe suggested a sauce to top the burger by combining a little ketchup and mayonnase. I also used zuchinni, not carrots. I topped ours with fresh tomato and avocado.

If you haven't tried quinoa yet, you should consider trying these! They are really tasty and incredibly filling, and of course packed with protein and fiber. Do you all have a tasty quinoa recipe we should try? Please share! Happy Wednesday! xo.

Thursday, December 15, 2011

Brie en Croute

The next recipe I want to share this week is Brie en Croute, a fabulous appetizer that I made this past Sunday. The first time I had this was in college with our Supper Club group of girls for our Christmas dinner. I had never had brie before {I always heard it was not for everyone}, but this tasted amazing.  Paula serves it up with crackers, but I have also tried apples and that is tasty as well. It looks pretty appetizing, doesn't it? Can you tell I like cheese much? Enjoy.


INGREDIENTS 
1/4 cup brown sugar 
1 egg, beaten 
1 small (8-ounce) wheel Brie 
1 tablespoon unsalted butter 
1/2 cup chopped walnuts 
1 sheet frozen puff pastry (package comes with 2 sheets)
1/8 teaspoon ground cinnamon 
Crackers, for serving

DIRECTIONS
Preheat oven to 375 degrees F.

Defrost 1 sheet of puff pastry for approximately 15 to 20 minutes and unfold (place remaining sheet in freezer for later use). Melt butter in a saucepan over medium heat. Saute walnuts in butter until golden brown, approximately 5 minutes. Add the cinnamon and stir until walnuts are well coated. Place walnuts on top of Brie and sprinkle brown sugar on top of nuts.

Lay the puff pastry out on a flat surface. Place the brie in the center of the pastry. Gather up the edges of the brie, pressing around the brie and gather at the top. Gently squeeze together the excess dough and tie together with a piece of kitchen twine. Brush the beaten egg over top and side of Brie. Place Brie on a cookie sheet and bake for 20 minutes until pastry is golden brown.


So, tell me...do you like brie? I cut off the top "rind" because I heard that is the part of brie that people tend to not like {I am a brie novice}! Any other good brie recipes I should try? 

Have a fab Thursday! xo.

Monday, December 12, 2011

Christmas Cheese Ball Recipe

The first recipe I want to share with you this week is the no-fail Christmas Cheese Ball. Afterall, nothing says Christmas Party like a good old fashioned cheese ball! Originally, I made it on Saturday with the intention of planning ahead to serve on Sunday night with the girls from work. Since it made two cheese balls, I ended up serving one Saturday night with friends, wrapped the other one up in the fridge and served it Sunday night! How awesome is that?! So if you have back-to-back parties this year when you need to bring a dish, think of this one and your life will be so much easier!  Here it is.


INGREDIENTS
2 packages (8 ounces each) cream cheese, softened
2 cups (8 ounces) shredded sharp cheddar cheese
1 tablespoon finely chopped onion
1 tablespoon diced pimientos
1 tablespoon diced green pepper
2 teaspoons Worcestershire sauce
1 teaspoon lemon juice
Chopped pecans, toasted
Assorted crackers

DIRECTIONS
In a large bowl, combine the first seven ingredients. Shape into two balls; roll in pecans. Cover and chill. Remove from the refrigerator 15 minutes before serving. Serve with crackers. 
Yield: 2 cheese balls (1-1/2 cups each).


 Both crowds loved it and a handful of people are reminding me to pass along the recipe so they can use it for parties coming up! What is your favorite Christmas Recipe? I am a sucker for appetizers and sweets so that is usually what I offer to bring to a party. Snacking on this with a glass of wine in hand and you can call me a happy girl.

I am linking up to Schue Love where there are already lots of delicious recipes that I am drooling over. Check it out and have a wonderful Tuesday!! xoxo

Holiday

Wednesday, December 7, 2011

Food, Drinks and Dogs: My Week in pictures

I'm sure like most of you/all of you, I have been crazy busy over the past week. In between the prepping for the holidays and other craziness, I took a bunch of photos {via iphone, it's always so handy} and here we have it. Bear with me, this is the old iphone-I get the new one as an early Christmas present tomorrow:)

Hubs started my birthday in a delicious fashion- bacon, egg and cheese on an English muffin. 
It was my birthday, and I indulged.


My older sister and her hubby gave me a beautiful gift set from L'Occitane and the box was amazing. I am currently finding a place for that pretty Hermes Orange color I love.


Night #2 of celebrating with friends at Amos Mosquitoes, their signature dessert is s'mores at the table with your personal campfire. So amazing. A little birthday treat from them.


 My sweet girl making the trip with me to Raleigh for my sister's birthday. She travels well.
 {husband was hunting so this was a girls night}


Dinner at Flemings Steakhouse- I ordered a Christmas Margarita- it was so good!


Normal camera pics- me and the hubs before birthday dinner with his family.


And one with our pups! Tucker looks so happy.


And, my latest appetizer craze. I saw these on A.Liz Adventures a few days ago and I had to make them. Her blog is one of my favorites to read. If you haven't checked it out yet, head on over now. These are "Parmesan crisps" and are amazing. Stephen was in shock when I whipped these out in a matter of minutes. 
They are little piles of Parmesan cheese heated in your pan.
 Check out her details here. And, thank her later after you make them! 


Well that is enough random photos for the week, did you get through all of that?! 
 We are going to spend the rest of our night watching Home Alone 2...tis the season! xo.

Monday, December 5, 2011

Cheesy Chicken and Rice Bake

This was tonight's dinner and I highly, highly recommend it! It does look amazing, right? It also seems to be fairly healthy and was so delicious. Since it is just the two of us, we have plenty of leftovers which we plan on making into burritos for tomorrow's lunch {this is me going out on a limb...I am not a huge leftover person!}
Here's the recipe.


Ingredients:
2 whole Boneless, Skinless Chicken Breasts
4 cups Cooked Brown Rice
¾ cups Frozen Corn
15 ounces, fluid Can Black Beans, Drained And Rinsed
1 cup Plain Greek Yogurt (or Sour Cream)
4 ounces, fluid Can Green Chilis
½ cups Salsa
1 cup Low-fat Cheddar Cheese, Plus More For Topping
2 Tablespoons Fresh Cilantro For Garnish

Directions:
Preheat oven to 350F. In a large bowl, combine all ingredients except for cilantro and mix thoroughly to combine. Make sure the yogurt and cheese are stirred in throughout the entire bowl. Season with salt and pepper if desired. Transfer to an oven-safe dish and top with extra cheese if you would like. Bake for 20-25 minutes, or until heated through. Garnish with chopped cilantro.

There was also a tip on this website to have cooked chicken on hand to make it easy to throw recipes like this together {let's be honest, that will never happen here!} but cooking the chicken didn't add too much time on to my preparation process.  Also, use Uncle Ben’s Ready Rice-which I did. It's a definite keeper. Oh, and have you had Tostitos Roasted Garlic and Black Bean Chips? We snacked on these before dinner- they require no dip or anything, just plain delicious! 
We are slightly addicted.


Hope y'all had a great Monday! xoxo

Tuesday, November 8, 2011

Chicken Stew for the Soul

Last night my sweet husband made us this stew for dinner. Soup/stew just sounded good because we both have some sort of cold after the weekend. I'm sure it has nothing to do with tailgating at 9 am at Carter Finley Stadium on Saturday (GO PACK!) 

Anyway, this recipe comes from my girl Christy Jordan and her cookbook Southern Plate. Christy says,
 "Please make this chicken stew. Its that good. Its so good that it actually bothers me to think that some of you might only look at the photos, read the tutorial, and never make it. Its so good that if I could, I would seriously arrange a time and place for all of us to meet up under a tent somewhere in the middle of the country just to serve you this chicken stew."

SOLD. 


Ingredients:

1 chicken
2 lg onions, chopped
7 cups water
4 cups canned tomatoes
6 med.potatoes, peeled and diced
3 Tablespoons sugar
2 cups frozen or canned whole kernel corn
2 Tablespoon butter
5 teaspoons salt
2 teaspoons pepper

Directions:

-Cook chicken until done in water. Remove chicken from broth and discard skin. Separate meat from bones and shred meat.
-Dip off as much fat from the broth as possible.
-Simmer potatoes in 1 cup of broth in covered saucepan until done, do not drain. Mash potatoes slightly, keeping them lumpy.
-Add corn, onions, tomatoes, sugar, salt, and pepper to broth.
-Cover and simmer for 20 minutes.
-Add potatoes and chicken and simmer slowly with lid off for at least 45 minutes.
-Right before serving, stir in butter and let it melt. Best if made a day ahead and reheated to serve.

(Y'all did expect butter to be in the stew right? We are in the South! haha)

Christy says to make a day ahead but we had ours the night of, and will be having those leftovers for lunch today. She also says it freezes well, which is great because Stephen and I are not good about eating leftovers for days at a time. I already packed up two containers of the soup for the freezer to have on another cold night. I also made some Crescent Rolls (round kind, love those) to serve with the stew, but I think mini saltines would have been great too. 

Everything I have made by Christy has been SO delicious and she somehow understands we don't want to spend a fortune at the grocery store and spend all night cooking. She makes it simple. Her dishes are southern and they remind me of something you would expect your mom to whip up. If you do not have her cookbook, I highly recommend it!!

Have a great Tuesday! xoxo