Showing posts with label furniture re-do. Show all posts

Wednesday, March 30, 2016

How to Make A Double Campaign Chest

Thanks so much for all the love on my campaign dresser + gingham drapes post yesterday! I am literally obsessed each time I walk by Weeks' room and it makes me smile to see it coming together! So, I am glad y'all shared in my enthusiasm and appreciation for the space so far..thank you :)


Today I am going to run over the quick steps of how we accomplished the Double Campaign Chest. I had been itching to use the Young House Love hardware on a piece of furniture, and as I did a little brainstorming I decided that the Ikea Rast was the perfect piece!  We've all seen plenty of transformations on the Ikea Rast, so it's not reinventing the wheel or anything...however, it did turn out pretty good. And since I like to see steps, I did a simple documentation of our process along the way!

First, assemble your Rasts. I planned on doing it myself and Stephen couldn't resist helping me. He was surprised that they were actually made out of wood and not a fiber board :)

Next, we attached them together. First, Stephen used some wood glue on one side of the dresser and attached them side by side. The glue is a little extra reinforcement to keep them in place and also make sure it is firmly secured throughout the whole dresser. Then, he used wood screws to screw the two pieces together, as seen below... You want to use a screw that isn't too long that wont poke through the other side. {I believe these were 1 1/4"} He did 6 screws all together: top and bottom of dresser- 2 in the front, 2 in the middle and 2 in the back. You will need to remove the drawers for installing the screws. 


Once the two dressers were attached, we could tell it was a solid unit and were pleased with how easy it was so far! Here it is, now one unit.


One thing about the Rast I have never been too fond of is the way the sides are taller than the top of the dresser. I knew it would drive me nuts not to have a completely flat surface, so we then attached a piece of wood, cut the length of the top of the dresser.  We used a piece of good quality pine, adding a little more wood glue on pieces that touch to attach it to the top of the dresser. More wood screws securely attached the top board to the dresser, so it now looks like this:


Next came the finishing touch: the trim piece! I knew I wanted to do this because I saw how nice of a look it gave our living room bookshelves. We used a piece of trim on the three sides to provide a finished ledge and fill the gap you see above. In order to do this, you would need to make miter cuts and have a nail gun to attach the trim.


Next comes the part that makes it look like a quality piece of furniture. I used wood putty to fill every crack and nail hole. You also want to fill the holes that the provided knobs were supposed to go in, if you are using the campaign hardware. Once that is all dry, sand away any rough patches. You are ready to paint! We primed it, lightly ran over it with a sanding block and then it got several coats of Valspar Furniture Paint, in Simply White.

The finishing touch is of course the Campaign hardware. It was a little tricky for me to get each piece positioned just right. I learned quickly Stephen needed to pre-drill the holes for all the corner pieces in order for me to get it right. He saved the day with pre-drilling those holes, thank goodness.


I couldn't be happier with how it turned out, and am so happy we pulled this one off {painlessly!} Let me know if you have any questions, I am happy to help :)


Tuesday, March 29, 2016

Double Campaign Rast + Gingham Drapes

So we made some real headway on Weeks' Big Boy Room this weekend, such a relief! Today I want to share this side of his room, now adorned with navy gingham and a double campaign chest {ikea} hack. 


I could not be happier with how the campaign chest turned out. I did not want it to look like a DIY piece of furniture by any means, ideally I wanted the real thing! With a few small changes to the Ikea Rast, we were able to get pretty darn close to what I envisioned all along. I couldn't be happier- it might be my favorite furniture piece I've ever worked on! 


The hardware really upgrades the look of course. I love that we have six additional drawers for storage- something that the nursery lacked as Weeks got older and those clothes and toys got bigger! 


The bookends are from the nursery but they are still perfect for a little boy. For now, I grabbed a lamp from another room until I decide on something more permanent. I was thinking a set of smaller lamps on each end, possibly. And, I just found the soft basket a few days ago at Ross, and piled a few books in there for now. The artwork is a print from a local festival that is held locally every October- Stephen has had this print forever and I even remember seeing it in his college room! I had it re-matted and painted the frame gold last summer. After seeing it done I always held it in the back of my mind for Weeks' future room!


I did the drapes myself {whew, big sigh of relief they are done!} and I'm in love. I went with a back tab style, with a blackout liner since this room is incredibly bright some days.


Here you can see the rod that I found which was a steal compared to the original inspiration rod.


I followed this tutorial if anyone is interested in this style drape- it was fairly easy, I have to say!


What do you all think? Next on the list for the Big Boy Room: Stephen is building the bed and we have to remove all excess furniture and accessories. His dresser will be here next week. Then we can really move him in his new room! 

I'll share the details of how we did the Ikea double campaign rast tomorrow!

Wednesday, September 18, 2013

Chalk Paint Hutch Details


Thank you all so much for your sweet comments on our hutch! It really makes such an impact in our living room and I couldn't be more pleased.


BEFORE


Looking way rustic here...

(sweetness was supervised, no worries) 

AFTER


What I used...
Annie Sloan French Linen
Annie Sloan Soft Clear Wax


What I did...
I was immediately drawn to chalk paint for the ease of the process- no sanding and no priming! Win-win. The dealer I bought my paint from gave me a few tips for chalk paint, being a first timer. The first coat, I brushed on normal. The second coat I added about a tablespoon of water to a small plastic bowl that I used to put my paint in. It really helped for the second coat to go quicker and smoother.
I tried brushing the wax on and that was a pain. It took forever and the bristles from my brush kept falling out (it was cheap). So I quickly converted to an old kitchen towel to rub the wax on. It worked fine for me!
Overall, I loved the chalk paint technique. Since there it literally NO smell, I didn't even feel like I had a painting project going on.

Styling...
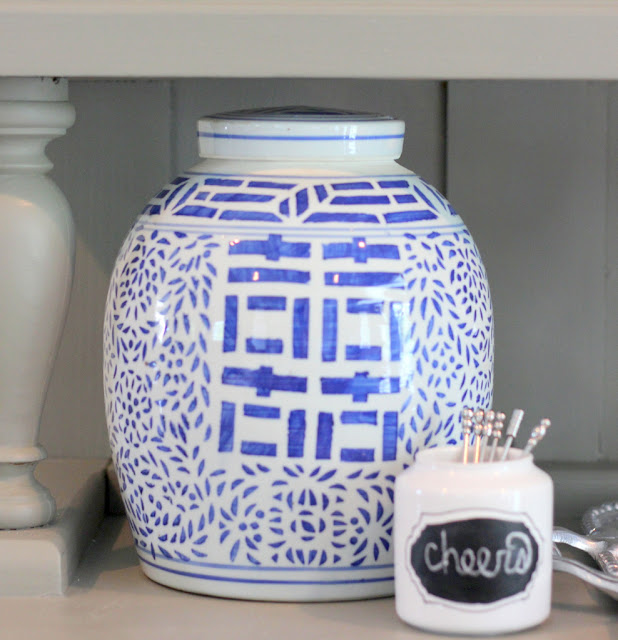
This had become an eyesore/catchall for the random things I didn't have place for in the kitchen. Does that happen to anyone else besides me? I always have nooks that end up catching all my clutter. I am so happy to see it look like a real part of the room, not just a random assortment. The only things I purchased recently were the blue and white pieces- off of ebay and a local antique shop. Everything else was shopped from my own home.


A few of my favorite cookbooks will stay on display here. The bookend I found at Homegoods last fall.


The new hardware was super cheap. Found at Hobby Lobby for around $5 and purchased at their 50% off rate. I spraypainted them gold (they were originally a distressed off white).


I also framed the cover of my Lulie Wallace Calendar for 2014. I'm restraining myself not to frame every single picture from each month! This was a plain white frame from Michael's and I used a paint brush to add the gold trim strip in a groove.


Hope y'all enjoyed this new favorite corner of my home!

Tuesday, September 17, 2013

Chalk Paint Hutch

A little furniture project I've been working on....


This hutch is in our living room and it finally feels like it belongs there. I bought it several years ago  before I had moved in our house and didn't have any idea what direction I wanted to go in decorating.


Styled with my blue and white finds I've been piecing together...


We have a very open floor plan. Not my favorite- I would so much rather have a traditional floor plan with the rooms broken apart. That is so much easier! So our kitchen flows into the living room, making this update alllll part of our kitchen makeover.


I couldn't be happier. I first saw this paint used by my friend Pam at Simple Details on her beautiful piece here. I knew right away that was the look I wanted for my hutch. Thanks for the inspiration Pam!


I'll share the details tomorrow!

Thursday, November 3, 2011

Desk Reinvention

Over the last couple of months, we have been moving furniture from one room to the next. This involves letting it sit in the hallway for weeks at a time, moving it to the garage, moving it back inside, moving it back to the hallway because it needs a place to go...you get the picture! When we added a bookcase in the man cave, we turned it into more of a sitting room than an office and the desk had to go. Then, I started my closet clean up and I had an idea to use his old desk in our closet as a vanity-type-built in of sorts. Here is the desk in the closet before- it is dark and hard to see any of the pretty woodwork in a shadowy closet.


I did barely any prep work and lucked out. I just primed it with a latex primer and used BM Linen White in semi gloss finish, the same color as the walls. Painting it was SO easy- I picked up a high density foam roller made for doors & cabinets and it made this painting quick and painless. 


So, here is what the closet looks like today....


Sorry for the poor lighting- it is still a little dark in there, that is the next thing on the list. So here are the details...I made an obvious hardware change for these sleek brushed stainless pulls, available at Lowes- they were the most expensive part but well worth it.


I also found some chevron drawer liners from the Container Store and lined all of the drawers with it. I just wanted something fun and these fit the bill. They are non adhesive but have that "stick" to them so my jewelry stays in place and neat, even when it is laid out in a drawer and I am opening and closing it. 


Other additions to the closet include a new striped rug from Crate and Barrel. I had a gift card with some remaining funds and it was the perfect size for the closet. The horizontal stripes make the closet seem wider, and I am all for that! I also bought a little white cube ottoman at TJ Maxx last week. It must have been delivery day because I have never seen our store this full of so many great finds. It was a steal and it opens up for more storage-another place to stash my stuff!


I'm not going to lie, I loved styling this also. I adore little trays and dishes to hold my jewelry, so I relocated them here instead of my nightstand. The teacup was actually my place setting at my bridesmaids luncheon so it is near and dear to my heart, and I love my jewelry in it! I am also a collector of fashion and decor books and have lots of them throughout our house.


I really am enjoying this in our closet and I love that we had a space to use a piece of old furniture that we otherwise would have had to give up! It is pretty to look at when I am in the closet picking out something to wear- we all know we need some inspiration some days!

What do you think? Good reinvention of an old desk?!

This is linked to: