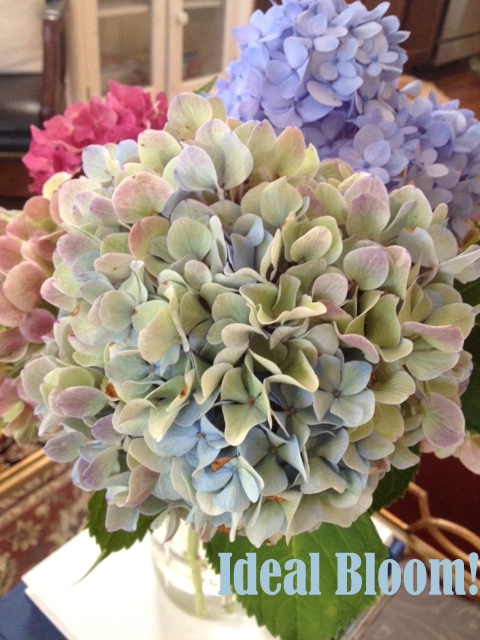
Last week when I mentioned my dried hydrangeas in my laundry room post, I had a few questions on my process. I have tried a few methods in the last few years, but the easiest method I have found happened accidentally. Now is the perfect time for you to try this if you have hydrangeas in your yard!
Your first step: assemble an arrangement of freshly cut hydrangeas in a vase of water. I learned that at this point during the year the blooms have had time "dry" out a little bit so they aren't full of moisture like they are early in the season. The less moisture = the better your dried flowers will turn out. In this photo, you can tell the faded blooms are older than the vibrant blue and pink that are newer.
Next step: Enjoy this arrangement! This arrangement sat on my coffee table for at least 2 weeks, which is about the perfect amount of time for these to completely dry.
This is a close up example of an older bloom. The color at the beginning of the summer was bright blue and it gradually faded into these pretty shades of green and pink and blue. The feel of these petals is slightly dryer to the touch and has the antique look to it. This makes the perfect bloom to dry.
The two green hydrangeas below also made great dried flowers. The bright blue {new bloom} in the center was one of the first to wilt and be thrown away. I let mine sit in the vase with water for a few weeks and let them slowly dry. Once they become crisper to the touch I let them sit on a paper towel until I was ready to arrange them.
Now how easy was that? The only work here was clipping them from your garden and arranging them in a vase {one of my favorite things to do!} For more details on this method, you can read here.
I have also experimented with drying hydrangeas in a silica gel that you can buy at Michaels. I had pretty good results...but to me, this is so much easier. For more info on that, see here.
Now, here is what they look like today.
Now, here is what they look like today.
Have you dried any hydrangeas from your yard? I love having them around in the fall, they are the perfect tones for adding subtle color while transitioning into the cooler months.
PS- Linking up to Hi Sugarplum for projects that fall into that fun category of "In About an Hour"...check it out for more easy + fun things to work on this weekend!
PS- Linking up to Hi Sugarplum for projects that fall into that fun category of "In About an Hour"...check it out for more easy + fun things to work on this weekend!
xoxo.


7 comments:
OK, this is a total "Must Try"!!
Love the look of dried hydrangeas! I had some in my apt and they kept getting brushed up against (b/c we live in a shoebox) so I took the petals and put them all in a clear round bowl-- love them like that as well!
Love this, I have a hydrangea plant on my kitchen table that I'm going to try this with!
they dry fabulously!! if you didn't tell me i thought they were still real
I love hydrangeas - they always look so pretty!!! I am totally trying this!! :)
Love this! I will definitely have to try this. Usually I just freeze dry mine which gets expensive. So this is a new must! xo
I just pinned this tutorial and will have to try it!
Post a Comment